Highlights
- Read and save: a Geopackage layer in Python
- Read and save: a Geopackage layer in R
1. What is the GeoPackage (GPKG) format?
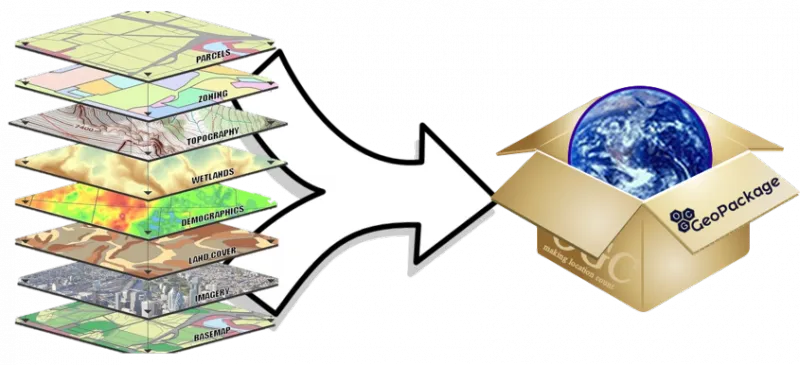
GeoPackage (GPKG) is an open and non-proprietary data format that allows different layers, both spatial and non-spatial, to be stored within the same file.
These layers can include:
- Spatial Layers with vector data such as points, lines, and polygons representing geographic features; Raster Data with gridded data representing continuous phenomena like elevation, land cover, or satellite imagery.
- Non-Spatial Layers such as tabular data: Attribute tables associated with spatial features, containing information such as attribute values, metadata, or statistical data or metadata: Descriptive information about the dataset, including authorship, data sources, coordinate reference systems, and data quality indicators.
GeoPackage’s ability to accommodate various types of spatial and non-spatial data in a single file makes it a versatile and efficient format for storing geospatial information. In this blog post, we are going to read and save geopackage’s layers using python and R.
2. Read a Geopackage layer in R
Let’s download a simple Geopackage file. The following file comprises a GeoPackage file containing two building layers corresponding to two small cities in Italy: Grosseto and Sinalunga. First, you have to put the geopackage into your working directory. Then, you can run the code below to import the Grosseto layer and print the first rows of the dataset.
#Load the sf library
library(sf)

# Read the Grosseto layer of buildings
Grosseto = st_read("Italian_cities.gpkg", layer = "Grosseto")

# Print the first rows
head(Grosseto)
3. Save data into a GeoPackage’s layer using R
Let’s create another layer by doing a simple buffer over the buildings of Grosseto. The st_buffer function from the sf package allows doing buffer quickly. In addition, the code belows perform a buffer of 10 meters around the buildings of Grosseto. Then, the newly created layer is saved as an additional layer into the original geopackage using the st_write function.
# Perform a buffer of 10 meters
Grosseto_10B <- st_buffer(Grosseto, 10)

# Save the newly created layer
st_write(Grosseto_10B, "Italian_cities.gpkg", layer = "Grosseto_10B")
4. Read a Geopackage layer in Python
If you are new to Python, you can refer to this post to set up your Python environment with Anaconda and the Jupyter Notebook for spatial analysis. We will work with the same Geopackage file than for the R application. First, place the Geopackage in the same directory as your notebook. You can now run the code below to import a layer in Python using the GeoPandas library. In this example, we are importing a layer of building related to the italian city of Grosseto. In order to check that the layer has been imported, you can print the first rows using the .head function.
import geopandas as gpd
Grosseto = gpd.read_file("Italian_cities.gpkg", layer = "Grosseto")
Grosseto.head()
5. Save data into a GeoPackage’s layer using Python
You can use the ‘to_file‘ method provided by GeoPandas to save a new layer in the GeoPackage. For example, the code below reproject the geometries in a projected CRS, perform a buffer of 10 meters and save a new layer named « buffered_Grosseto » in the GeoPackage « Italian_cities ».
# Re-project geometries to a projected CRS
Grosseto = Grosseto.to_crs(epsg=6875)

# Create a buffer of 10 meters around the geometries
buffered_Grosseto = Grosseto.buffer(10)

# Save the buffered layer to the GeoPackage file
buffered_Grosseto.to_file("Italian_cities.gpkg", driver="GPKG", layer="buffered_Grosseto")
I hope you enjoyed this short tutorial about how to work with the geopackage format in Python and R. Don’t hesitate to comment and provide feedbacks by engaging with this post.
Table of contents

Leave A Comment