
Highlights
- Set Up MetaMask for Blockchain Development
- Get Free POL Tokens on the Amoy Testnet
- Verify Wallet Activity on the Amoy Explorer
Before you can deploy smart contracts or explore decentralized applications, you need a crypto wallet and access to a test network. This guide will walk you through setting up MetaMask and obtaining free POL tokens on Polygon’s Amoy testnet.
1. What Is Polygon and What’s a Testnet?
Polygon is a Layer 2 blockchain network built on top of Ethereum. It’s fully compatible with the Ethereum Virtual Machine (EVM), which means developers can use the same tools (like Solidity and MetaMask) and deploy smart contracts on Polygon just as they would on Ethereum — but with lower fees and faster speeds. Just like a developer might test an app on a “staging” version before going live, blockchain developers use testnets to try out smart contracts and decentralized applications (dApps) without risking real funds.
Testnets behave like real blockchains but use fake tokens and simulate real-world conditions, including:
-
Smart contract deployment
-
Gas usage and fees
-
Wallet interactions and transactions
On the Amoy Polygon testnet, you use test POL tokens, which have no real-world value. They’re distributed for free via faucets and are used to simulate transaction costs, test smart contracts and interact with dApps before going to mainnet. Since testnets are for development and learning, the tokens don’t come from real exchanges. Instead, developers request tokens from faucets — special services that send small amounts of testnet tokens (like POL on Amoy) to your wallet.
2. Set Up MetaMask
MetaMask is one of the most widely used browser-based wallets for Ethereum and EVM-compatible chains like Polygon. It’s beginner-friendly, well-supported, integrates directly with Remix, and is available as a browser extension and mobile app.
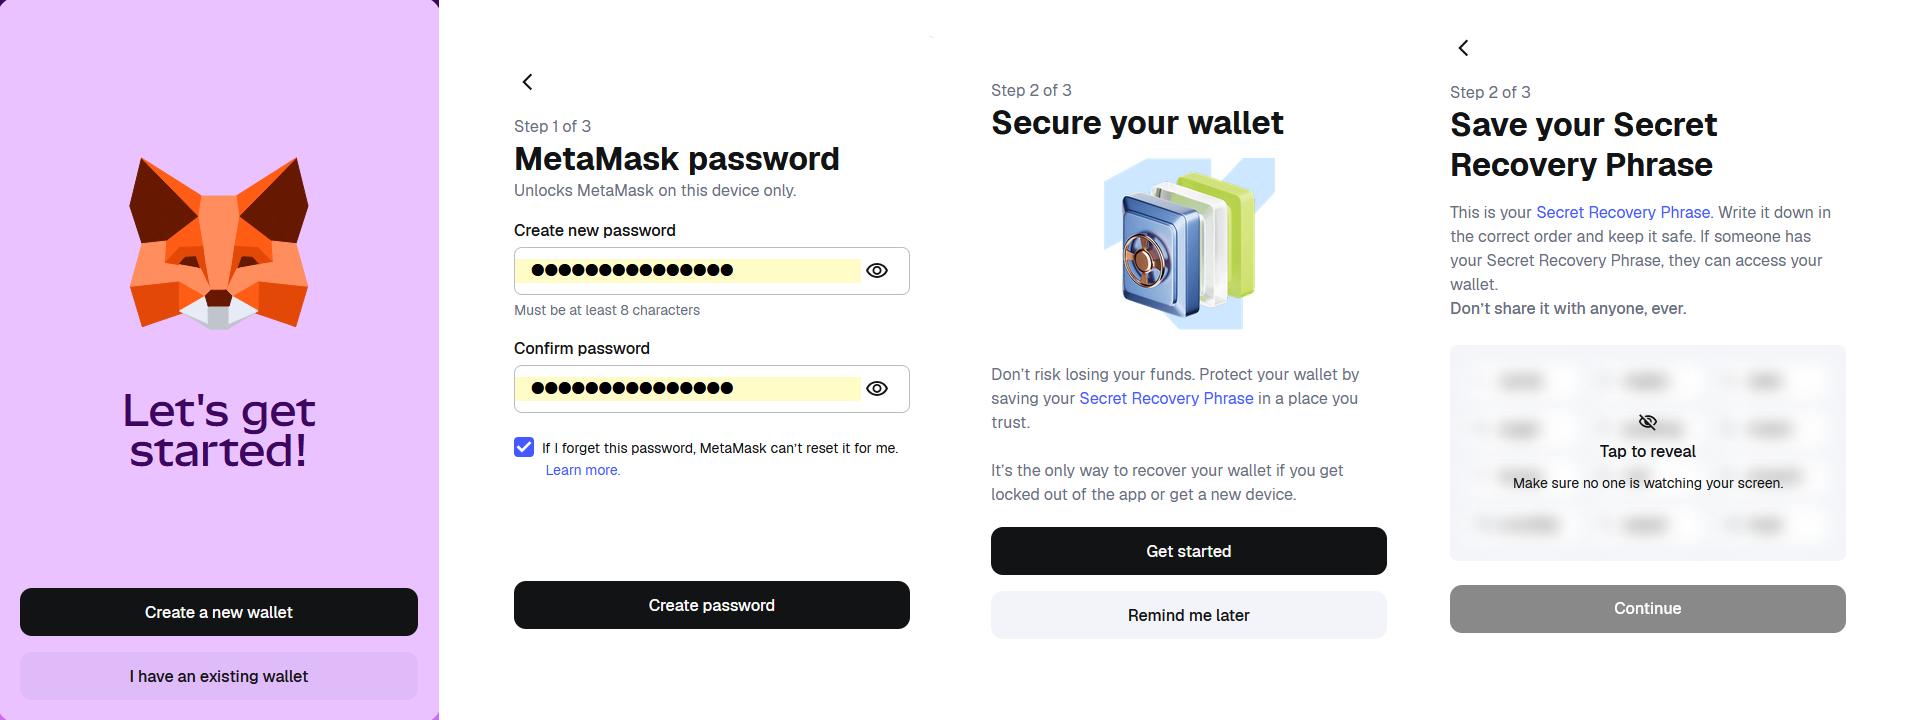
Other wallets like Rabby or Trust Wallet are excellent alternatives — especially for more advanced users or specific use cases — but MetaMask remains the simplest and most universal option for getting started with smart contracts. To get started, install MetaMask and follow the steps shown in the figure below to create your wallet safely.
Understand Password vs Secret Recovery Phrase
The password you create in MetaMask only unlocks the extension on your local device. If you lose it, you can still recover your wallet on any device using your Secret Recovery Phrase. That phrase is everything. It’s a master key to your wallet — anyone with it can access your funds, and if you lose it, your wallet is gone forever. That’s why you should store it offline, ideally on paper or in an offline password manager, and never on your computer or cloud storage.
3. Add the Polygon Amoy Testnet to MetaMask
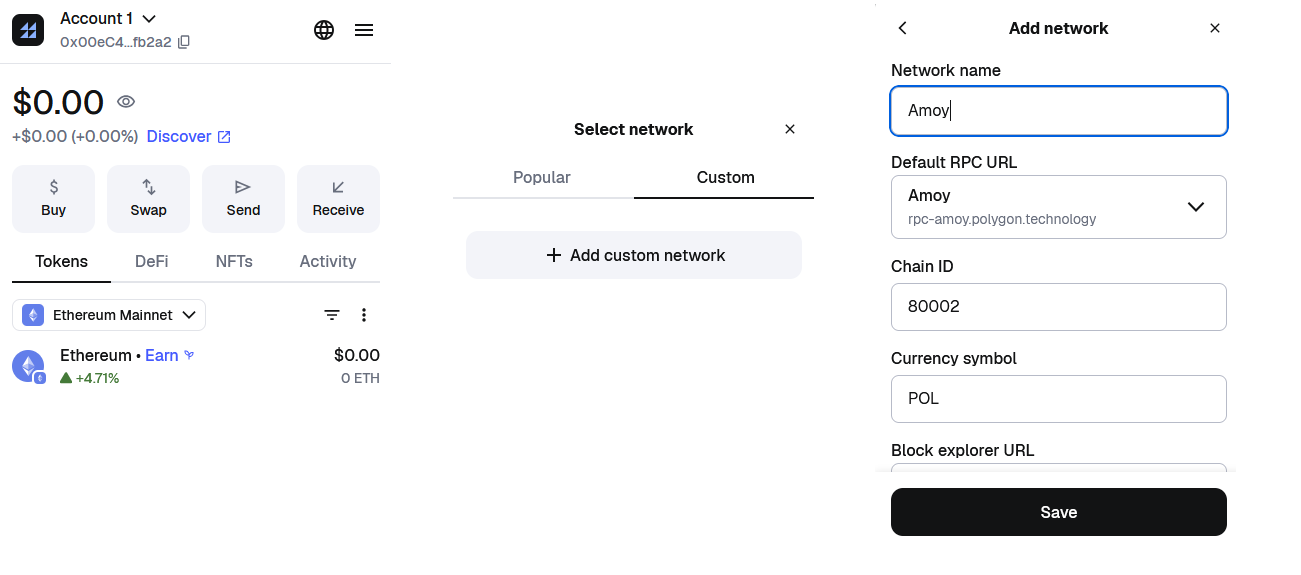
The Amoy testnet is the official test network for Polygon. To add Amoy to MetaMask, open MetaMask and click the network dropdown, then click Add network > Add a network manually and enter the information below.
Network Name: Polygon Amoy
New RPC URL: https://rpc-amoy.polygon.technology
Chain ID: 80002
Currency Symbol: POL
Block Explorer URL: https://www.oklink.com/amoy
The figure below shows how it should look once Amoy is added to MetaMask. After saving, you’ll be ready to interact with dApps and smart contracts on the Polygon Amoy testnet.
4. Get Free POL Test Tokens
To interact with the Polygon Amoy testnet, you’ll need test POL tokens to pay for transactions.
Visit the Polygon Faucet, paste your wallet address, and select Amoy as the network. To prevent spam, the faucet requires you to verify your request by connecting a GitHub or X (Twitter) account — your wallet does not need to be connected. You can also request test tokens from third-party faucets if you don’t use GitHub or X.
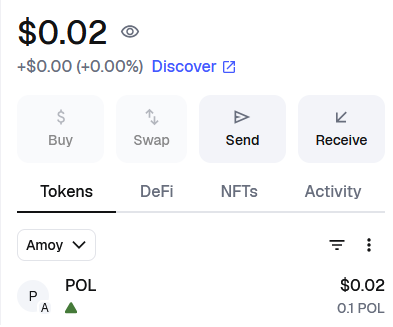
Once verified, request the POL tokens. They should arrive in your wallet within seconds and appear under the Amoy network, as shown in the figure below.
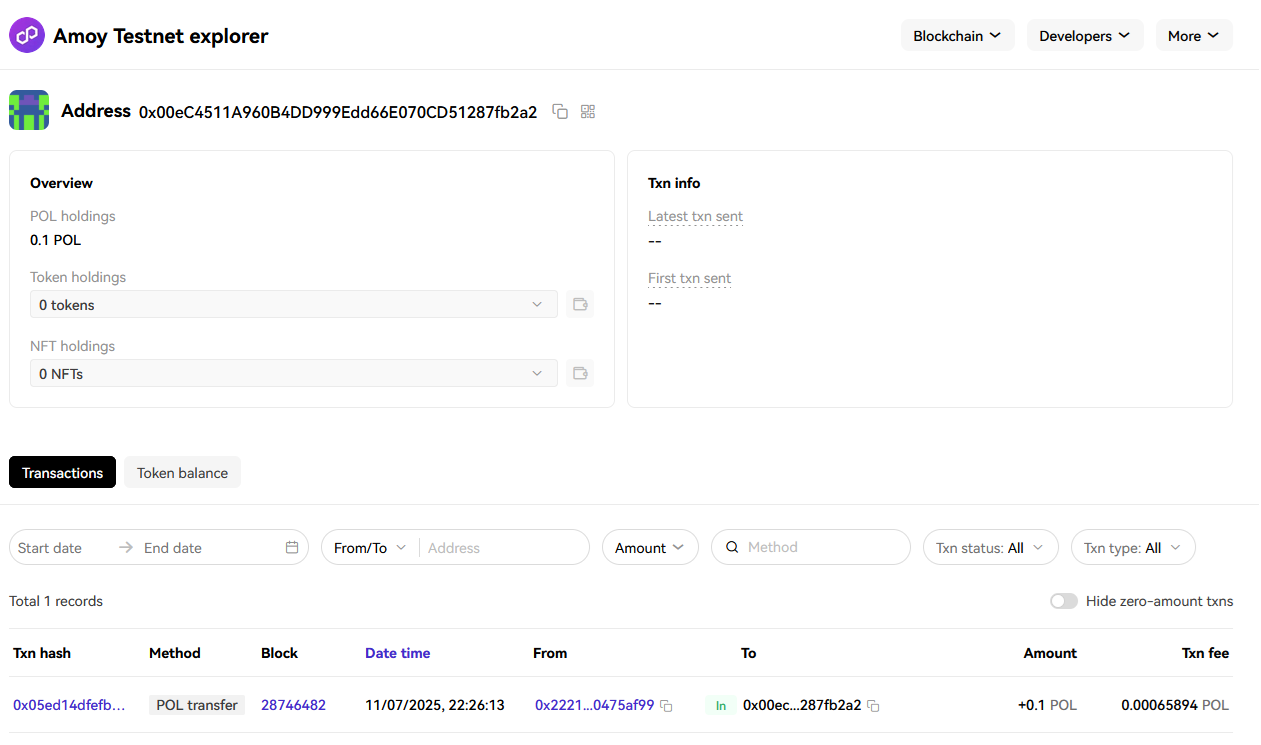
You can now view your wallet activity directly on the Polygon Amoy Testnet Explorer. Just paste your wallet address into the search bar, and you’ll see your balance, transactions, and history — like the receipt of your test POL tokens. From here, your wallet is ready to use: you can send and receive tokens, monitor activity, and begin connecting to decentralized applications (dApps) built for testnets.
Stay tuned — this post is the first in a series. In the next entry, we’ll use Remix to deploy a simple guestbook smart contract to the Ethereum Sepolia testnet, verify it on Etherscan, and write messages on-chain from our MetaMask wallet. You’ll learn to interact with contracts on-chain and begin experimenting with decentralized logic in practice.
Table of contents
Leave A Comment